Skip to content
Tech

G4 Cube & Cinema Display

A Review of both the Apple G4 Cube, and matching Apple Cinema Display

John Siracusa | 0
Story text

Introduction

About a month and a half ago, I received the following equipment for evaluation:

I will review these products both individually and as an entire system in this article. This test system is graciously on loan to us from The Chip Merchant! Here are some quick technical specifications before I begin. Absorb them now, because I’m not going to go into too much detail since all this information is available at Apple’s web site. But I do want to give a quick technical overview of the products for those not familiar with them. These specs apply specifically to the hardware I received.

Power Mac G4 Cube
CPU 450MHz PowerPC G4, 1MB L2 cache at 225MHz
RAM 1.5GB RAM via 3 PC100 512MB 2-2-2 SDRAM DIMMs
HD Maxtor 20GB ATA-66
Removable Matshita DVD-ROM (on the same ATA bus as the HD)
Video ATI Rage 128 Pro with 16MB VRAM on an AGP 2x bus
Ports 2 USB ports, each on an independent 12Mbps bus; 2 IEEE-1394 (FireWire)
ports sharing a single 400Mbps bus; 1 10/100Base-T Ethernet Port;
1 internal 56K V.90/K56flex modem; 1 Apple Display Connector (ADC) port;
1 VGA port; 28V DC power input
Price $1,799.00 plus $4,350 for the RAM, minus $300 when purchased with an Apple display.
Apple Cinema Display
Screen 22-inch diagonal, digital active-matrix liquid crystal display, 1600×1024 native resolution
Ports 1 Apple Display Connector (ADC) port; 2 USB hub ports
Price $3,999

I’ll revisit some of these items later, but this article is not going to be about technical specifications or performance measurements. Like the Cube system itself, this article will be about form and function…and the price of each.

Also note that I previewed the Cube in some detail in my recent MacWorld Expo 2000 article, and I don’t plan on covering the same ground twice. Please take the time now to go back and read that section of the article if you’re not already up to speed on the basic features of the Cube.

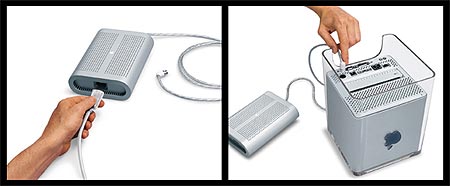
A note about the photography: I tried taking many pictures for this article with my cheap auto-focus camera, but it’s simply not designed to take close-up product photographs. You’ll see a few of my own pictures in this article, but most of them were pulled from Apple’s product photography and are copyright © Apple Computer Inc.

OOBE

The phrase “out-of-box experience” normally relates to the setup and configuration of a computer system: how easy is the hardware to set up, how quickly can the system get on the Internet, etc. As an experienced Mac user, it’s difficult for me to provide an accurate assessment of that experience. Of course it’s a snap for me to set up; I’ve been using Macs for almost 17 years now. So I’m going to leave that particular angle to MacHome magazine and other beginner publications, and focus instead on something that I find interesting and that I don’t frequently see covered elsewhere: the experience of literally taking the thing out of the box.

This seemingly irrelevant topic is the first step in recognizing the value proposition of this product. As should be obvious to anyone who read the specs on the previous page, this system is not about the price/performance ratio. Why would anyone buy it? Should anyone buy it? The answers all revolve around the intangibles, and my odd definition of “out-of-box experience” is but the first one.

OOBE: The Cube

Cube Top Not surprisingly, the Cube comes in a very small box: 21.5 x 15.5 x 13.5 (length x height x width, all in inches). It’s got typical product shots and lettering on three sides, with a dramatic close-up on the fourth (similar to the picture on the right.) It opens from the top, revealing a styrofoam box with rounded corners and a glossy cardboard flap featuring pictures of the Apple optical mouse and USB extended keyboard (see picture on the left below.)

Already we’ve got the first signs of the intended “premium” nature of the product. First, the styrofoam itself is not the “dry, flaky, squeaky kind.” (If you spend a lot of time opening computer or audio/video equipment, you know what I’m talking about here. If not, rest assured that this is the “bad” kind.) Instead, Apple uses the “dense, waxy kind” (as it does with all its recent products.) Next there are the curved corners: seemingly pointless and probably more expensive to produce—

Cube OOBE - Part 1 …right about now you’re thinking I’ve lost it. Who cares what the packing materials are like? What does this have to do with the quality of the product? Is nice styrofoam supposed to make up for the huge price tag? But step back a minute and consider Apple’s motivation here. Like other “boutique” brands (e.g. Bose or Bang & Olufsen), it’s important for Apple to provide a uniformly high quality experience with its products. And yes, that certainly includes packaging. In fact, psychologically, packaging may be one of the most important first impressions. The customer needs to be reassured from the very start that their money was well spent. It’s not so much that they’ll be impressed by the packaging, it’s just important to prevent the feeling of “cheapness” that might result if “standard” packaging materials and techniques are used. Welcome to the wonderful world of marketing.

Cube OOBE - Part 2 Flip the cardboard lid and you’ll find the keyboard and mouse, each meticulously dual-wrapped first in a clear plastic bag, and then coated with “clingy” clear plastic protective coverings that stick to the surfaces with a non-marking static sort of cling. Again note the curved well for the mouse, and the duplication of that same shape for the wells on the right (holding an extension cable covered later) and the left (entirely empty; present seemingly only for the sake of symmetry.)

Cube OOBE - Part 3 Removing the keyboard reveals the instruction manual (also wrapped in clear plastic) and software bundle, the power cord (left) and the supplied FireWire cable (right). Finally, lifting the entire top of the styrofoam box off reveals something that looks more like your typical packaged computer: the Cube itself in the center, with the external power supply on the left and the external stereo speakers and amplifier encased in yet another styrofoam clamshell on the right. Both the Cube and the power supply are well mummified in a gray padded rubber/plastic material, and the Cube is adorned with yet more of the clingy clear plastic protective covering beneath.

Cube OOBE - Part 4 Let’s examine the components up-close, again checking to see if the value proposition holds up. Are we getting the sleek, attractive, high quality product Apple has promised?

We’ll start with the external power supply. It’s about the size of a VHS cassette, but slightly wider and thicker. It’s got vents on both sides, and small clear rubberized feet on the bottom. AC power from the wall goes in one end via the included standard three-prong computer power cord (with clear ends but an opaque gray cord), and 28V DC comes out the other end via a permanently attached clear cord with visible braided shielding that ends in a small, four-pin plug that looks like an odd male serial port connector. This small end connects to the bottom of the Cube.

Cube power supply
The Cube’s external power supply

Ignoring for now the technological implications of the external power supply, this component alone has a host of “useless” features that add expense: the curved sides, the clear cord, the intricate venting, the tiny clear rubber feet, the custom four-pin connector, etc. A plain black power brick would probably cost half as much to manufacture (or simply buy as commodity product.) But things aren’t quite as high class as they seem. The outer case tends to flex a bit, for example. That’s definitely a “low quality” feeling.

This is a problem for all but the most expensive brands of electronic equipment: features that look impressive and cost more to manufacture, but are kept within sane price ranges through less obvious cost-cutting measures. The external power supply could have been machined from a billet of brushed aluminum at tremendous expense, and it would certainly look and feel a lot more sophisticated. It’d also cost an insane amount of money. Very, very few manufacturers can afford to go that route. So you end up with a stylish, more expensive, but still not quite perfect item: an external power supply whose case flexes or an automatic sliding glass door on a B&O stereo that sometimes gets stuck or makes a funny noise. The “near-high-end” is a tricky market.

Mouse, Keyboard, Speakers, Cube, and…cracks?

Apple optical mouse Apple’s new optical mouse was reviewed in my MacWorld Expo 2000 article, so I won’t repeat myself here. I will, however, add something to my previous comments. Having spent more time with the mouse (and being forced to use it with the Cube) I’ve decided that the tracking issues discussed earlier are bad enough that I personally wouldn’t use it as my primary mouse, especially on a large screen like the 22-inch Cinema Display. My habit of “flicking” the mouse around regularly exceeds the optical tracking’s acceleration threshold, causing erratic behavior. I still don’t think it’ll be an issue for most users (go watch your parents use the mouse sometime; mine, at least, appear to be moving in slow-motion), but it’ll undoubtedly turn off gamers and users used to fast-flicking.

Apple extended keyboard The new USB extended keyboard was also briefly reviewed earlier. I have a few additional comments after spending more time with it. First, the lack of space between the top row of function keys and the row of number keys frustrates me. I’m used to feeling for the “top edge” of the main key area in order to hit the number keys and, more importantly, the backspace key in the upper-right corner. The upper-right key on the main key area of the new keyboard is F12. I have the same problem with the page-up key; I tend to end up hitting F15 instead. The second issue is the that tops of the key caps are wider and flatter than what I’m used to, causing me to mis-hit or double-hit more often. These are purely personal issues of habit, however (although “feeling for the top row” really is helpful since delete and page-up are used more often than the Fn keys.) The key feel is similar to the old USB keyboard (e.g. light and very quiet), but with a somewhat sturdier feel.

The mouse ably fulfills its role in helping further the premium quality of the system: it’s very solid thanks to its thick, one-piece top shell/button, it looks absolutely fabulous, and there are no loose or flexing parts. The keyboard is similarly high class when in use as a keyboard, but lift it up and give it a manual “torsion test” and it feels a little too flexible. Compared to my daily-use keyboard (the ADB Apple Extended Keyboard II, a product that was code-named “Nimitz” with good reason), it’s downright noodly. Then again, the Extended II retailed for $200 back in the early to mid 1990’s. So once more a component falls a bit short of the high quality target set by its appearance due to, presumably, cost concerns.

A final note: as mentioned in my initial review of the new mouse and keyboard, they’re both leaps and bounds better than the puck and mini-keyboard they’re replacing, and they’re at least as good as the typical original-equipment PC keyboards and mice I’ve used (and certainly look a lot better), number of buttons and scroll wheels aside.

Speakers

The Cube's Harmon Kardon speakers The speakers are created for Apple by Harmon Kardon and are clear spheres about the size of large oranges. They’re connected via short (~26-inch) cords to a tiny (4 x 2 x 0.5 inch) amplifier box. The amp box is another rounded-corner affair similar in shape to the external power supply, but with a clear case covering a black core. It has a headphone outlet in one end and a thick, short (~16 inch) USB cable coming out of the other end. Digital audio comes out of the Cube via USB and gets converted to an analog signal and amplified by this little box.

As you might guess from looking at the size of the speaker cones, there is very little low-end power. The system would benefit greatly from an external subwoofer. (And trust me, there definitely isn’t room inside the Cube for one.) That said, the mid-range and high notes are reproduced admirably. I’m no audiophile, but to my untrained ears the “imaging” of these little orbs was superb. They can get loud enough to become uncomfortable to a person sitting right in front of the computer, but don’t expect to fill a room with sound.

On the quality meter, the speakers pass with flying colors. The construction is solid, the sounds is better than you’d expect from a tiny pair of “computer speakers”, and the look is striking as usual.

Cube

Cube front Finally we come to the Cube itself. The entire unit is taller than it is wide, and therefore not technically a cube. But I guess “The Power Mac G4 Rectangular Solid” just doesn’t have the same ring to it. The Cube may get off on a technicality: the white unit suspended inside the clear case is actually an 8-inch cube. And it is indeed suspended, literally, from the top of the clear outer case. The oval vent on the top has a wedge-shaped profile. Although there are two small screws flanking the vent, the majority of the of the weight of the white cube is borne by the wedge-shaped vent assembly.

Speaking of weight, the Cube weighs more than you’d think given its size: almost 20lbs. Nearly half of that weight is the clear outer case and white metal liner. The clear case is very thick at the top, tapering slightly as it goes down. It looks sophisticated and expensive, especially the thick areas that are carved out to provide holes for the drive slot and cooling vents. The power button is another high-class touch. It’s a simple glyph next to the top vent that’s printed the surface of the case. There are no moving parts and there’s nothing special about the paint or the plastic beneath it. Near the top of the case, below the surface of both the plastic and the white inner-liner is a touch-sensitive button that is activated by changes in capacitance. The button also has a small light in it, and any operation of the “button” will cause the light to glow beneath the surface. Touching the unflinchingly solid brick of plastic and seeing that light instantly come to life deep below is a satisfying experience.

Cube three-quarter view The thickness and solidity of the case has a downside, however. The first thing I noticed is that it transmits any vibration inside the Cube directly to the desk surface. This is most noticeable when the DVD drive is in operation. I can actually feel the vibration in the key caps of the keyboard—a keyboard that’s in a keyboard tray that’s attached to the desk. Touching the Cube itself reveals almost no vibration; it’s all transmitted cleanly through the thick rim of the case to the surface below. Car reviews speak of NVH factors (Noise, Vibration, and Harshness), and I think that same measure is applicable to the Cube. A high level of NVH is definitely a low-quality experience.

The second downside of the thick, clear case is more cosmetic than functional, but it’s received a lot of attention from customers and in the press: cracks. Or “mold lines” or “knit lines” or “scratches”, depending on who you ask. My Cube has them, and in the same places as most other Cubes: around the screw holes on the top, and near the drive slot on the front and top. I’m calling them “cracks”, and here’s why.

First, they’re not scratches in that they weren’t caused by another item rubbing up against the surface and they do not physically resemble scratch-like valleys or grooves plowed out by another object. Second, they’re not “mold lines” because the actual mold lines on the Cube are clearly visible and are very different. Mold lines exist as vertical seams on all four outer corners of the case. Everyone knows what mold lines look like: they’re the “ridges” you see in most plastic structures. Third, I don’t consider them “knit lines” in that they do not appear to be the result of plastic flow anomalies.

They’re cracks, although they do not go all the way through the surface of the case. Think of a muddy surface drying and cracking in the sun. Those cracks may not go all the way through the mud; they’re “surface cracks.” More precisely, on the Cube they’re “hairline surface cracks” in that they’re very fine and not deep at all. The cracks on my Cube are not visible from more than about a foot away, depending on the lighting in the room. They’re even difficult to feel with the tip of your finger. The best way to feel them is with your finger nail. I wasn’t able to get any clear photographs of the cracks in my Cube, but they are nearly identical in size and position to the ones shown in the picture from ZDNet below:

Cube cracks
Cracks in the Cube’s case

ZDNet has obviously gone to great lengths to make the cracks visible, lighting the case from beneath in a dark room and removing all the insides, including the white inner liner and the screws. Above you can see a close-up of the crack near the drive slot, and you can also make out the two cracks that bisect the screw holes on either side of the central vent.

Cracks are most certainly a low quality experience! Despite the fact that they’re not a structural problem at all (and don’t appear to be in danger of becoming one), they are the worst kind of cosmetic problem: something that is not “important” enough to really fix, but which will grate on those that care deeply about the appearance of their hardware…the very same people that are most attracted to a system like the Cube!

My theory from the start has been that these are manufacturing defects caused by the difficulty of molding such a large single piece of clear plastic. That seems to be confirmed by what I’ve read from self-proclaimed plastics experts on the web. Apple is sticking to the “mold lines” nomenclature for obvious reasons: a “crack” is a defect, while a “mold line” or “knit line” is simply a “side-effect of manufacturing.” But the bottom line is that it’s a PR problem for Apple. Supposedly the problem is “fixed” now, which I translate to mean that the number of Cube cases coming out of the factory with these hairline surface cracks is decreasing as the manufacturing process is refined. I can’t imagine them ever being eliminated entirely without a change in materials or a huge increase in manufacturing cost (e.g. throwing out all the bad ones, melting, and re-molding them.)

Cube Core

Cube ports
Cube ports

Cube core being lifted out All the ports are on the bottom rear surface of the Cube, and were discussed earlier in this section of the MacWorld Expo 2000 article. Briefly, the two ports you may not recognize are the 28V DC power connector and the Apple Display Connector (ADC) port. The MacWorld article included a table listing the pin-outs of the ADC. ADC is eerily similar to VESA’s Plug and Display (P&D) standard. The connector shapes are different, so technically they’re not “the same connector”, but the pin-outs look very similar and both use Transition Minimized Differential Signaling (TDMS) to transfer video and “other stuff” (power, USB, etc.) on the same cable without the major interference problems inherent in this arrangement.

The entire “core” of the Cube lifts out via the retractable handle on the bottom. What you’ll find inside is a sort of metal exo-skeleton frame held together by torx screws. This is another complex, difficult-to-manufacture part, this time serving style indirectly by enabling the dense packaging job necessary to get all this stuff into an 8-inch cube. The Cube uses Apple’s UMA-1 motherboard architecture. For those that don’t know, UMA is Apple’s Unified Motherboard Architecture. The UMA-1 initiative was started several years ago and is now used in every computer Apple ships.

Cube core exposed That’s not to say that every Apple computer has the same motherboard. UMA-1 is simply a set of motherboard components: sound chips, i/o controllers, the north bridge, etc. The actual board sizes and component layouts vary greatly between models. Nowhere is this flexibility more evident than in the Cube. The UMA-1 components have been divided among many small printed circuit boards, all connected by ribbon cables, riser cards, and T-junctions. There are several Cube-specific components and tiny extra PCBs for things like the touch-sensitive power switch, the digital audio output, and power distribution. There are also a handful of colored LEDs (mostly red and green) inside the case, many of which peek out through various vents and slits. (For more pictures of the insides of the Cube, check out this complete disassembly diary from an Italian web site.)

Cube cooling tunnel view The various components and PCBs are arranged around a central chimney or tunnel which is itself formed by the gaping holes in the absolutely huge central heat sink. The photo on the right (courtesy of the Italian web site mentioned above) shows the central heat sink tunnel from the top. (The circle above the tunnel is the sensor for the power switch.) All this heat-conscious design may make you think the Cube produces a lot of heat. And as you might already know, there is no cooling fan inside the Cube. But there are other more important things missing, most notably the power supply and the audio amplifier. Those two components together seem to put out more heat than the Cube core in my informal “hand tests.”

So how much heat does the Cube put out? My answer after over a month of steady use: not much. The first thing you’ll notice is that a hand on the top of a Cube that’s been working hard for hours will simply not feel any significant heat. Only on rare occasions have I even felt the plastic case get detectably above the ambient temperature of the room. I suspected that the case itself may just be a very good insulator, so I removed the core to check the “internal” temperature. The insides were as hot as you’d expect, with the DVD drive and the Rage 128 heatsink being the hottest components. But the overall temperature was pretty cool—certainly no hotter than the equivalent components in my cavernous, fan-sporting G3/400. The huge central heat sink definitely seemed to be doing its job; the area around the CPU never got more than mildly warm.

The final heat test was the “smell test.” There is a clear smell of “electronics” coming from the top vent. What’s an “electronic” smell? Go smell the top of your CRT monitor right now. That’s the smell, only the Cube’s smell is not nearly as pungent as what comes off the top of a typical CRT. The Cube also never gets nearly as hot as the top of a CRT. Nevertheless, that smell is my only concern about the Cube’s temperature. I don’t think it’ll ever overheat or abruptly fail, but I suspect that the lifetime of the internal components may be shortened somewhat. But “shortened” by how much? I don’t know, but I’m optimistic. My Mac 128k (the very first fan-less Mac) which was in regular use from 1984 to 1997 still works just fine, and that case has the motherboard, a floppy drive, the power supply, and a 9-inch CRT all inside the same case.

Cube Complete

Let’s take a look at the complete package. Below is a picture of everything that comes in the Cube box:

Cube complete
Mouse-over the photo and look here or in the browser’s status bar for item descriptions

VGA extension cable There are a couple of items you might not recognize. First is the “VGA extension cable.” As seen in the photo to the right, it’s a stubby extension cable that attaches to the VGA port and extends it outward 6 inches at a right angle. This dongle may be necessary if you have an old Apple monitor that requires an Apple-video-to-VGA adapter that makes the entire connector assembly too large to fit under the Cube. Remember that there’s only about 2.5 inches of clearance under there. I used the extension cable to hook up my Apple 17-inch Studio Display CRT (while I was waiting for the Cinema Display to arrive) despite the fact that the connector would have fit beneath the Cube. The extension cable simply makes it a more convenient connection and relieves stress near the connectors. I actually wish I had a similar extension for all my large cables; I hate seeing bulky connectors poking out of the back of the machine and bending downwards under the weight of their thick cables. (SCSI cables are the worst, in my experience.)

The second curious item is the “Apple Hardware Test CD.” Boot from this CD and you’re presented with a simple tabbed dialog that includes a testing pane, an information pane, and an “about this software” pane. The testing pane couldn’t be more simple. There are four buttons: Quick Test, Extended Test, Shut Down, and Restart. The Simple and Extended tests both examine the AirPort card (if present), the Logic Board, the memory, the modem, and the video RAM. (The extended test just takes a bit longer and does a more thorough job.) The information pane gives a brief overview of the hardware configuration (DIMMs installed, processor speed, cache size and speed, ethernet MAC address, etc.) It’s not as extensive as the Apple System Profiler included in Mac OS, but it hits the highlights.

It’s good to see this type of thing included with the system. It’s OS independent since you must boot from the test CD to use it, it provides information that will be very helpful during any sort of hardware support call, and it can help give users peace of mind when they suspect a hardware problem. One of the Macs in my office had a bad third party DIMM installed—bad enough to cause memory corruption from time to time, but not bad enough to keep the system from booting—and it took forever to track the problem down, eventually requiring a third party hardware test application. If the Mac had come with a hardware test CD, that likely would have been one of the first things tried.

Cinema Paradiso

The Apple Cinema Display

Cube complete
Mmmmm…digital…
Want to download the desktop background seen above? Two sizes: big and huge

Let me start by saying one undeniable thing about the 22-inch Apple Cinema Display digital active matrix LCD: you want this monitor. Even if you don’t yet know that you want this monitor, trust me, you do. Don’t try to deny it. Its screen area is 22-inches on the diagonal and its thickness varies from 1.25 inches on the edges to about 2 inches in the center. It’s completely digital. It has a single cord coming from the back of it: an ADC cable. There’s not even a power cord. If you were to take this monitor back with you a decade or so into the past, it, perhaps more than anything else that exists in the world of computer hardware today, would look impossibly futuristic and magical. It’s as elemental as computer display devices get these days: a flat, thin panel with single cable poking out of the back. And I suspect that if Apple could have made it wireless, it would have.

That said, a nagging question remains: rationally, should you want this monitor? It’s not an open and shut case. First there’s the price tag: $4K. I don’t know about you, but my entire computer system (CPU, monitor, internal and external drives) didn’t cost that much. Fine, so you’re filthy rich and money means nothing to you. It’s an obvious purchase then, right? Before living with the Apple Cinema Display (ACD) for a month, I’d have agreed. But there are certain qualities that all LCDs share that keep this monitor from being absolutely superior to all other CRT and LCD monitors.

But first, the upside to being a digital LCD. Sharpness has to be the biggest benefit. Working with the ACD for a few hours and then switching back to even the sharpest CRT you can find results in some squinting as you wonder, “is this CRT out of focus or something?” Do not adjust your set, the individual, independently controlled picture elements in an LCD easily trounce any CRT’s sharpness. Next there’s the refresh rate, or rather, the lack thereof. You may be proud of your CRT’s “rock solid” 100Hz+ refresh rate, but nothing’s as steady as an “always-on” LCD. Then there’s the digital interface. The clean, pure 1’s and 0’s running end-to-end in this system do more than give geeks a warm fuzzy feeling, they also ensure perfect control and reproduction of each pixel. There’s only one adjustment on the ACD: a brightness control. Color calibration is done at the factory and presumably doesn’t drift over the life of the display (as happens with phosphor-based CRTs.) And, of course, all LCDs are perfectly flat, a quality shared by only a few CRTs.

On top of all this, the ACD is the best LCD I’ve ever seen. It’s the brightest, the sharpest, and has the best color quality to my eyes. But being “the best LCD” does not necessarily translate to being “the best monitor.” Let’s return to the dark side of LCDs.

First there’s the dead pixel issue. It’s extremely difficult to manufacture the thin film transistors that sit behind each and every pixel on an active matrix LCD. In order to keep prices within sane levels (yes, $4K is currently considered “sane” for an LCD of this size) a certain number of non-functional pixels are considered acceptable, provided they are widely spaced (the exact rejection threshold varies form manufacturer to manufacturer.) Dead pixels have been a fact of TFT LCD life for years, and the issue hasn’t gone away. That said, if there are any dead pixels on the ACD I received, I certainly couldn’t find them. Maybe I got one of the “perfect” ones.

Next is the viewing angle issue. Many LCDs become very dim when viewed from angles that diverge greatly from a direct 90-degrees. Again, the ACD is superb in this respect, so much so that I actually didn’t have room to reach the viewing angle limits since my desk is hemmed in on both sides by other furniture. Apple claims a 160-degree viewing angle, and I found that to be a conservative estimate.

LCDs also have a reputation for nonuniform color distribution. The easiest way to test this is to fill the screen with a solid color and then look for any areas where the color appears “washed out.” Unfortunately, the ACD suffers from this affliction, although to a lesser degree than any other LCD I’ve seen. Still, it’s nowhere near as capable of creating a uniform field of color as any of the CRTs I own.

The native resolution of this monster is actually quite conservative: 1600×1024. My 17″ CRT can beat that by going all the way to 1600×1200, but it becomes unusably blurry and shaky at that size. Apple wisely chose a “comfortable” native resolution that never becomes an eyestrain issue. Down-scaling to lower a resolution is handled surprisingly well. The antialiasing trickery used to create a “virtual” smaller screen (640×480 or 800×600, etc.) from 1600×1024 discrete picture elements looks about as good as a large CRT at that resolution. Putting my 17-inch CRT and the 22-inch ACD both into 640×480, for example, looks equally fuzzy on both. And hey, in games (which are probably the only applications that would use that resolution), it’s kind of like getting full-screen antialiasing for free.

But speaking of games, there’s one final problem: how fast can the image on the screen change? Active matrix LCDs are vasty superior to the old so-called “passive matrix” LCDs that suffered from extreme “ghosting” problems during any and all screen updates. You may remember this problem from the days when most laptops came with passive matrix screens, and moving the cursor produced a clearly visible “trail” of phantom cursors (and I’m talking about when the dubious “cursor trails” feature found on some laptops was turned off.) The best way I found to test screen update speed was to turn on a fast-moving OpenGL screensaver that bounced a spinning, morphing 3D object around on a black background. Whammo, ghost city. The effect is not detectable at all during “normal use” (e.g. using office-type applications, browsing the web, or even playing movies), but does show up during fast-paced games like Quake 3. Gamers, this is not your monitor.

My final answer based on performance factors alone is that the 22-inch Apple Cinema Display is not the “ultimate monitor.” It’s merely one of the very best, but you’d also need another one of the very best of the other breed (CRTs) to truly have the best of both worlds.

ACD Intangibles

Apple Cinema Display: The Intangibles

ACD QuickTime VR movie. (Larger version)

The QuickTime VR movie above actually shows the older version of the display that shipped with a DVI connector (there are ADC to DVI adapters available now that allow new Macs to use old DVI Apple Cinema Displays, but not the other way around) but aside from the cable and connector, the hardware is basically identical. I’ve included this QTVR here to resume the discussion of that high class, “premium” experience that one expects at this price point. Despite the technological limitations discussed on the previous page, I think the ACD delivers this in spades.

I’m not going to go through the whole out-of-box experience again (mostly because my pictures of the process didn’t come out well.) But I’ll try to give a quick overview. The 22-inch ACD’s box is huge: 28 x 24 x 12 inches. It’s larger than my largest suitcase, and even sports a sturdy suitcase-like plastic handle in the appropriate place. Inside are huge pieces of that same high quality, needlessly sculpted styrofoam, complete with rounded corners and edges, and an intricate circular channel for cable routing. The display itself is wrapped in thick, clear plastic on the outside, and a form-fitting cheesecloth-like sheath under that. It comes with a humorously simple one-page cardboard fold-out instruction card that basically shows how and where to plug in the only cord sticking out of the thing (hint: it goes into your computer.) It also comes with a soft, lint-free polishing cloth with which to clean the monitor: another nice high class touch.

Like the Cube, the ACD is deceptively heavy for its svelte proportions: about 25lbs. And also like the Cube, this gives a favorable impression of solidity and quality. The super-thick clear plastic “feet” in particular are impressively monolithic and provide a sturdy base for the hefty screen. Angle adjustment is another satisfying experience. The single rear “leg” is designed to slide along a desk surface easily. Its hinge is very stiff, but once in motion it glides nicely. The upshot is that the adjustment experience involves simply grabbing the top of the screen and pushing backwards or pulling forwards. Wherever you let go, that’s the angle the monitor stays at. At all times during the adjustment process, all three support surfaces (the two front “feet” and the central back “leg”) remain in contact with the desk. It’s another quality experience. Compared to the often stubborn and squeaky adjustment process on other monitors (CRTs with cheap stands, in particular), it’s an absolute dream.

Within the realm of LCDs, the ACD’s screen really is the best I’ve seen at this or any price. The parts other than the screen itself are also absolutely gorgeous to my eyes. This is one of the rare Apple products that actually looks better in person than in photographs. It also looks better from the back than it does from the front, in my opinion. The wide, sleek, glassy backside makes me wish my desk wasn’t up against a wall. The 22-inch ACD is also one of those rare pieces of computer equipment that will attract attention from people who don’t know or care a whit about computers, or about how difficult and expensive it is to make an LCD this size. Again, it’s the “future factor.” The ACD looks better than most sci-fi movie props—and it actually works.

Space efficiency is also touted as one of the benefits of these flat panels, but it’s an advantage that’s not realized in most situations. Take my setup, for example. My desk is against an empty wall. Positioning the expansive ACD’s screen surface a comfortable viewing distance from my eyes results in a large amount of empty desk space, but it’s all behind the monitor in the area where the neck of a bulky CRT would normally exist. I guess this space saving is relevant if you only have a narrow desk area, but it doesn’t really save much usable space on the typical deep computer desk unless you start stacking things behind the monitor. Still, in an ideal display environment (e.g. a desk facing into the room or otherwise not up against a wall) the ACD looks great from every angle and the space behind it suddenly becomes usable. It’d even fit on a narrow kitchen counter so the ultra-rich can see two full pages of their FileMaker recipe database.

One final item that perhaps only the truly anal-retentive will notice: the ACD doesn’t make any noise. “Neither does my CRT,” you may be thinking, but that’s not entirely true. When switching resolutions and especially when going into or waking from sleep, almost all CRTs produce a little “snapping” sound. Even if you’ve never noticed this before, spend a few weeks with an LCD and then switch back to your CRT and I suspect it’ll come to your attention. Needless to say, an electronic crackling or snapping sound is a decidedly low-tech, analog experience. The complete silence of the ACD scores it another few points in the intangibles race.

The Whole Shebang

The Complete System

Cube system setup
Cube system setup in six steps

The six steps above illustrate the dead-simple Cube setup process. The photos actually show the 15-inch ACD instead of the 22-inch, but the connections are exactly the same. What will immediately strike you about this system is the lack of cords. In an extremely minimal setup, there are only two cables connected to the Cube: power and the ADC from the ACD. (Follow that? That’s the Apple Display Connector from the Apple Cinema Display. Ah, acronyms.) The rest of the cords come from the two-port USB hub on the display: one goes to the external amplifier which is in turn connected to the two speakers, and the other is connected to the keyboard which is itself a USB hub for the mouse. This setup is another touch of future-world: a super-bright 22-inch screen attached to a computer with a 20GB disk and 1.5GB or RAM, sporting Harmon Kardon stereo speakers, all powered from a single outlet via a power supply the size of a VHS tape. And no fans anywhere.

Improving upon the simplicity of the arrangement is challenging, but possible: eliminate all cords, including power (RF peripherals and microwave power deliver maybe? I’m just thinking out loud here :-), eliminate all moving parts (solid-state storage anyone?), and reduce the screen to either eye glasses or a roll-out plastic mat or something. It’s telling that I have to invent technology to beat the Cube system. The Cube may not be the bleeding edge of technology, but within the realm of (admittedly high-end) consumer prices, it’s certainly “leading edge.”

Moving back towards reality a bit, the outlook is not quite as rosy. The cord count necessarily goes up when you want to do “real work.” First, there’s at least one network cable: ethernet or modem. Next, you’ll probably want to use one or more USB port for peripheral expansion (Zip drive, CR-RW, etc.) Finally, to use the bundled iMovie software you’ll need to attach a FireWire cable. And let me tell you, attaching these things to the underside of a heavy, slippery Cube with a touch-sensitive power/sleep button on the top is not an easy maneuver. The port placement is clearly a case of form over function. And if ever there was a computer case that needed handles, it’s the Cube. There’s no good place to lift this slippery little devil, and dropping it would likely be catastrophic given its density and the vulnerability of the edges of the clear plastic shell (no, I didn’t test this.)

Aesthetically, the system works in perfect harmony, right down to the synchronized soft pulsing of the lights on the monitor and the Cube during sleep (as described earlier in the MacWorld Expo article) made possible by the data-carrying abilities of the ADC. The power/sleep button on the display functions in exactly same way as the Cube’s own power/sleep button. This is Apple’s replacement for the traditional keyboard power button that was removed from the new extended USB keyboard. Unfortunately, you only get the benefit if you buy an Apple display, whereas the keyboard power button was available to every Mac owner (since the keyboard is standard equipment.) I give them points for innovation, but demerits for value.

The software-controlled volume up/down/mute buttons and the media eject button on the keyboard are nice touches. They follow the recent “custom button” trend in PC keyboards without resorting to another huge row of funny, rubberized buttons, but they’re only as good as the software behind them. It might be neat to re-map them to other functions for playing keyboard-intensive games like flight simulators, but support for this is limited at this time.

As described in the MacWorld Expo article, the Cube’s (and the monitor’s) touch-sensitive “power” button does not switch the system on and off in the traditional manner. Instead, it functions as a sleep toggle. Press it when the system is awake and it goes to sleep: the monitor turns off, the hard disk spins down, the CPU drops into power-saving mode, and the power lights on the Cube and monitor pulse softly. Touch either of the power/sleep buttons again and it springs back to life. Well, maybe “springs” is too strong a word. It takes 15-20 seconds to wake from sleep in Mac OS 9.0.4. (There are promises that this will be much quicker with the final release of Mac OS X.)

The idea seems to be that there’s no reason to ever shut down your fan-less Cube system: just put it to sleep when you’re done with it, and wake it when you want to use it again. You cut down on boot time and you can resume work exactly where you left off. This is exactly what I did with my Cube, and it worked like a charm. As promised, it’s dead-silent (and completely cool to the point of getting cold) when it’s asleep, and I found the pulsing lights have a charming, homey sort of feeling. Reduce the wake-up time to a second or two and I’ll be perfectly happy to sleep instead of shut down for the rest of my computer using life.

Conclusion

The Big Picture

Cube system with 15-inch ACD
Cube system with the 15-inch Apple Cinema Display (see size comparison)

Obviously the system I tested is well beyond both the means and the common sense of most consumers. The $4K screen and the 1.5GB RAM certainly put it over the top. But even with a sane amount of RAM (say, 128MB), the “cheaper” 15-inch Cinema Display, and the $300 rebate Apple is now offering for Cubes purchased with an Apple display, the price is about $2,700. And remember that’s $2,700 for a 450MHz G4, passable RAM and HD space, and a 1024×768 screen. This is an expensive system any way you slice it.

This is also an attractive system any way you slice it. If you value the style enough to justify the price premium and you don’t need any of the expansion that the Cube lacks, then this is the system for you. Assembling a more stylish and well-integrated system would be difficult at any price.

But even for the small group of buyers fitting the description above, there are caveats: the hairline cracks, the DVD vibration, the inherent limitations of LCD technology—all this should be considered before making a decision.

Are there enough of these buyers for Apple to recoup R&D costs and turn a profit on the Cube? I’m not so sure with this first generation product. Add a faster CPU (or even another CPU…now there’s a cooling challenge), a larger disk, more RAM, and get the kinks worked out of the case manufacturing and the software integration of the new features (here I’m thinking of Mac OS X support in particular) and reduce the price on top of all that, and I think you’ve got a winner. I also think Apple will be able to achieve most of these goals with its second and third generation Cube products. The LCD pricing and the availability of faster CPUs are the toughest problems since they are mostly out of Apple’s hands. Apple could respond by replacing the G4 with a fast G3 or by aggressively slashing prices on its smaller LCD in order to make up in volume what it loses in margins.

But that’s all in the future. For now, if you’ve read this review and were not dissuaded, and you have the cash burning a hole in your pocket, by all means, indulge yourself. If you’re willing to accept a few rough edges and the usual “early adopter” pitfalls, I think you’ll be satisfied with your Cube system. I know I’ve thoroughly enjoyed my time with the (admittedly, free) Cube system that arrived on my doorstep, cracks and all.

If, on the other hand, you’re like the vast majority of “PC enthusiasts” that read this site or, indeed, like the vast majority of consumers in general, a Cube system is not for you. Forget about internal expansion. Forget about raw speed. Forget about extra features like SCSI or a wide variety of 3D cards for games or even something a simple as easy access to the expansion ports it does provide. Buy a traditional PC instead, or even one of Apple’s own G4 tower systems. You’ll be much happier. Leave the Cube and the sleek Cinema Displays to the snooty neighbors. Your Sony stereo system sounds better than their Nakamichi rig anyway…

Cube alone


Again, we want to thank The Chip Merchant for hooking us up with this system; their support is much appreciated.

Photo of John Siracusa
John Siracusa Associate writer
John Siracusa has a B.S. in Computer Engineering from Boston University. He has been a Mac user since 1984, a Unix geek since 1993, and is a professional web developer and freelance technology writer.
0 Comments