Skip to content
Tech

DeployStudio: Heavy-duty imaging software for OS X

Ars dives deep with a heavy-duty imaging package for OS X.

Andrew Cunningham | 59
DeployStudio can deploy OS X, Windows, and Linux images to your Macs.
Story text

Macs are on the rise in businesses and educational institutions, and while IT managers might not like it, users are increasingly asking for more Mac support from their workplaces. Supporting Macs means coming up with ways to manage and configure them to run your programs and comply with your IT department’s best practices, and doing that quickly and effectively means finding ways to install pre-configured operating system images and approved applications on them.

Software like Disk Utility or Mike Bombich’s Carbon Copy Cloner, which can copy the contents from one Mac’s hard drive to another’s, are fine for imaging individual Macs, but these tools typically don’t scale very well, and administrators will still need to perform some post-install configuration tasks manually—things like renaming computers and binding them to directories. The tools Apple builds into OS X Server are more useful for larger deployments, but they don’t make it all the way there. The System Image Utility, part of the OS X Server Admin Tools package, can capture your images, and the NetBoot service will let you apply that image to multiple Macs without the need for third-party programs or bootable media. These tools can deploy fully configured images with all of your desired programs and customizations, but if you need to make changes for individual computers or departments, you’re left to either make these changes manually or create and maintain multiple images, adding to your workload.

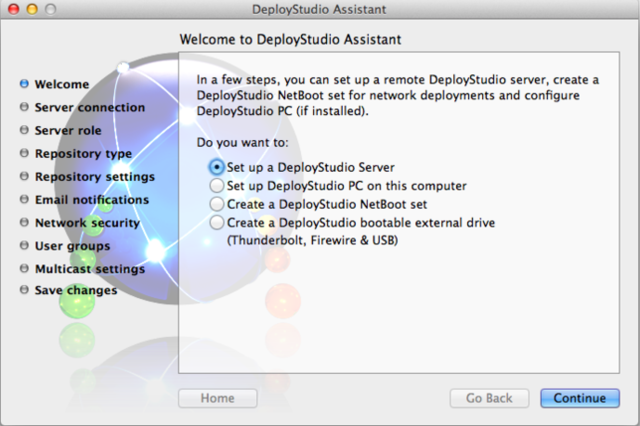
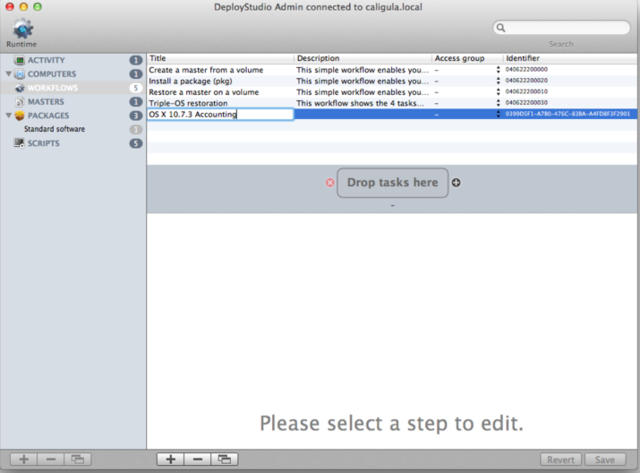
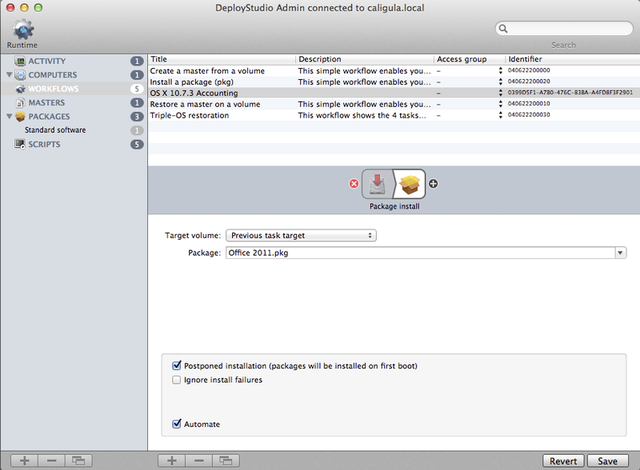
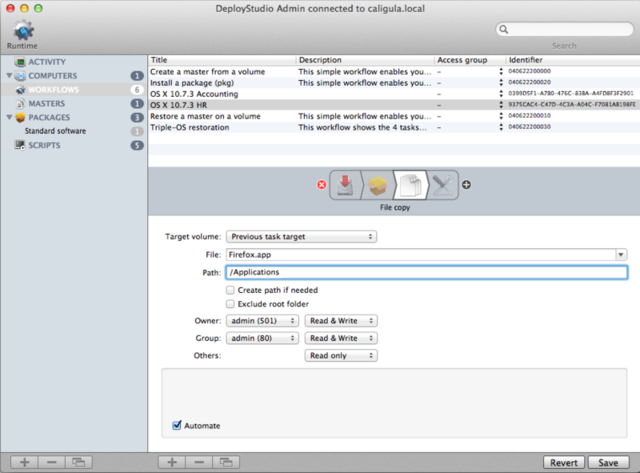
Enter DeployStudio, a free third-party tool that combines the convenience of NetBoot with flexible and customizable tools for automating application installs and post-configuration tasks. If you’ve got a large number of Macs to image and not a lot of time to image them, it may just be the program you’ve been waiting for.

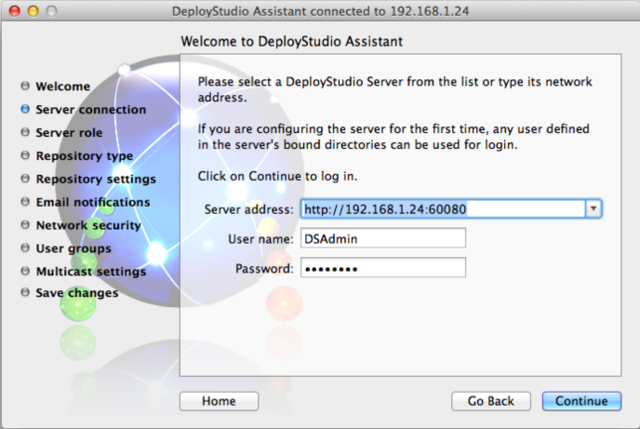
Setting up DeployStudio

DeployStudio can actually be installed and run from any external drive large enough to hold the software, a basic OS X install, and your images and installers; but the best and most convenient DeployStudio setup will use NetBoot to simplify the imaging process. This article will focus mostly on integrating DeployStudio with NetBoot, but configuring workflows and creating and restoring images will work the same way regardless of how your back end is configured.

Here’s what you’ll need to host DeployStudio:

  • A Mac running Lion Server and connected to your network with an Ethernet cable.
  • The NetBoot service. To enable and configure it, you’ll need the OS X Server Admin Tools, which are a separate download from Apple. Apple’s own documentation on setting up the NetBoot service is pretty extensive if you need help.
  • A networked file share using the AFP or NFS protocol. This does not necessarily need to be hosted on the same server providing the NetBoot service, though it can be.

First, you’ll need to download and install the DeployStudio package on your server. The current stable version is 1.0rc131b, but the project is updated fairly regularly with bug fixes, new features, and support for new OS X versions. Nightly builds are also available, if you prefer to live on the bleeding edge.

Once installed, launch the DeployStudio Assistant, which will walk you through configuring your server and your DeployStudio NetBoot sets. At first launch, accept the prompt to start the DeployStudio server service, and then select ‘Set up a DeployStudio Server’ from the list of tasks.

The DeployStudio Assistant will walk you through configuring your server and your boot media.

The first thing you’ll be asked to do is specify your server’s name, and a username and password that can be used to log in to it. The name can be either the server’s IP address or DNS name, if one is available, and the credentials can be any account that can log in to the server. I usually create a local, non-administrator service account called “DSAdmin” as a best practice, but this isn’t strictly necessary.

Your server address can be either an IP address or a DNS name, if you have one.

Next, you’ll choose whether your DeployStudio server will be a master or a replica—your first server will be a master, but additional replica servers can be used for redundancy and load balancing—and whether to use a local folder or network share point for your images and other files. You’ll need to enter the path to your network share point, as well as credentials that have read/write access to the share. DeployStudio will create several folders in this location that it will use for storage of files, images, and logs—remember this for later.

From here, everything else is optional. You can configure email notifications, whether to use SSL encryption, which port the server will use (the default is 60080, or 60443 for SSL), permissions to the various DeployStudio apps, and a few others. Configure everything as desired, and once you’re done you’ll be sent back to the main DeployStudio Assistant window.

Now, elect to create a DeployStudio NetBoot set. You just need to create a name and unique identifier for your NetBoot set and input your DeployStudio server’s information (the name, the port, and access credentials) to get what you need, but you can also change the desktop wallpaper, enable or disable wireless support, disable DeployStudio’s unobtrusive banner ads (with no penalty, though you will be prompted to donate), and you’ll be done. Since you’re creating the NetBoot set on the actual NetBoot server, the assistant will automatically offer to put the image in the right place and set it as the default, but you can also run the assistant on any OS X client and manually copy the NetBoot image to the server if you wish.

That’s it! You’ve configured a basic DeployStudio server, and are ready to begin using the program. DeployStudio NetBoot sets include not just the things DeployStudio needs to work, but also a handful of other tools like the Disk Utility and System Information tool. You can even add your own utilities and make your NetBoot set into a useful diagnostic and file recovery tool.

How it works

When an OS X client NetBoots to your newly created DeployStudio server, normally accomplished by pressing the N key at boot or selecting the NetBoot set manually in the Startup Disk preference pane, they’ll see the DeployStudio Runtime, which is actually going to do the hard work of creating and deploying images for us. By default, the Runtime can perform a few basic tasks, like capturing and restoring a basic image or installing a program, but to make DeployStudio worthwhile we’ll want to build our own customized lists of tasks, which DeployStudio calls workflows.

A multitude of tasks can be strung together to create complex DeployStudio workflows.

A workflow is an infinitely malleable set of tasks you can run on a client booted to your server. Using a properly configured workflow, you can partition and format a disk, apply an image, install applications (both by installing .pkg and .mpkg files and copying files to the Applications folder), bind Macs to a domain, run software updates, rename a computer, set a firmware password, create new local user accounts, and more. Customizing workflows is done using the DeployStudio Admin app, found in the Utilities folder after installing the DeployStudio package to your hard drive (the DeployStudio Admin can be run either from the server itself, or from a client computer with the DeployStudio package installed).

You can view and manage most of the files in your DeployStudio repository from the DeployStudio Admin app.

Plug in your server’s address and credentials, and you’ll see the DeployStudio Admin in all its glory. In addition to creating and editing workflows, you can also view and manage several other things here, all of which you’ll need to be at least a little familiar with to get the most out of DeployStudio:

  • The Activity pane will show you a basic log of what computers have connected to your server and run what workflows. More detailed log information can be found in the “Logs” folder of your DeployStudio share point.
  • The Computers pane stores information about every computer that has accessed the DeployStudio server, plus computers that you type in manually. DeployStudio tracks computers using their serial number, and this (along with the computer’s host name and IP address) are the only bits of information that get picked up automatically. You can select computers for this list and fill out additional information about them, create local user accounts, and even instruct the computer to run a certain workflow automatically, useful for computers that are reimaged at set intervals—you can also create and manage computer groups, rather than changing computers individually. Adding the “Configure” action to a workflow will then apply all of this information to the computer as it is imaged.
  • The Masters pane shows all of the OS X and Windows images currently stored on the server. You can delete, rename, and set access privileges to images here, but you’ll have to create them using the “Disk image” action in a workflow.
  • The Packages pane shows all of the packages you can install on your computers, and will also let you create package groups to install many at once. You can add packages to this list by copying them to the Packages folder on your DeployStudio share point. For programs that are copied to the Applications folder and any other files you’d like to copy to your clients, you’ll need to copy them to the Files folder on the share point.
  • The Scripts pane contains shell scripts you can use to do things that aren’t possible using the GUI. You can either create new scripts using the DeployStudio Admin, or copy ready-made scripts to the Scripts folder on your DeployStudio share point.

Now that you’ve got a basic idea of where everything is, let’s create some sample workflows.

Let’s take a common scenario: you’re replacing a bunch of Macs for users in various departments. You’d like every Mac that comes in to have your organization’s basic OS X 10.7 image installed on it, and all of your users will also need Microsoft Office 2011 installed. Users in HR will need Acrobat Reader to read job applications, while users in Accounting will also need Mozilla Firefox to open a particular intranet site. You’ve already set up a basic DeployStudio server using the helpful guide you found on Ars Technica, you’ve created your OS X image, you’ve entered the computers’ hostnames into the Computers pane, and you’ve already copied your packages and files to the appropriate locations on your DeployStudio share point.

First, let’s create a workflow for HR. Using DeployStudio Admin, go to the Workflows pane and click the plus button to add a new workflow named “OS X 10.7.3 HR.” Press the + button next to the area that says “Drop tasks here” to open up the drawer of available tasks.

Creating a new workflow in DeployStudio Admin.

First, drag the “Restore task” to your workflow. Under “Target volume” select “First disk available” to automatically apply the image to the computer’s internal hard drive, and under “Image” select your OS X 10.7.3 image. Rename the volume to “HR HD,” and make sure that “Set as default startup volume” is checked. If checked, the “Automate” option will automatically run these tasks without requiring additional interaction, while leaving it unchecked will let you verify or change these settings each time you run the workflow on a client. Check it for now.

Installing a package on a newly imaged hard drive.

Next, drag over the “Package install” task. Leaving the “Target volume” field at “Previous task target” to install the package on the disk you just imaged, choose your Office 2011 package from the drop-down menu. Leave “Postponed installation” checked—this will copy the package to the computer’s hard drive and then install it at first boot, which in my experience is much more reliable than trying to install it while the computer is Netbooted—then make sure that “Automate” is checked to install the package without requiring additional input from you. Drag over another “Package install” task and repeat the steps for your Adobe Reader package. Finally, drag over the “Configure” task, and check both “Rename computer” and “Automate” to rename the computer using the information in the Computers database, and click Save.

Workflows can contain as many tasks as you’d like, and can even contain other workflows.

Now you’ve got a workflow you can use to image Macs in the HR department, but you still need to customize the workflow for the Accounting department. Since most of the steps involved in the Accounting workflow are similar, just select the HR workflow and then click the Copy button, located at the bottom of the screen to the right of the plus and minus buttons, to copy the workflow, and rename it “OS X 10.7.3 Accounting.”

Using the File Copy task, you can also install apps like Firefox that don’t come in .pkg format.

Now, select the workflow, select the “Package install” task that installs Adobe Reader, and use the red delete button to remove the task from the workflow. Drag over a “File copy” task and place it in between the remaining “Package install” task and the “Configure” task. In the File field, select FIrefox.app from the drop down menu, and copy it to /Applications. Set your access permissions as desired—I usually give the owner and the admin group Read and Write permissions and other users Read Only permissions—check Automate, and click Save. Without creating a separate image, you’ve created two different configurations, and both the time and storage space saved can be quite considerable if you use more complex workflows or have more configurations in your organization.

Going Further

The sample workflows you’ve just created are just part of what DeployStudio can do—you can create workflows that exist only to install or update programs on an existing OS X install. You can set computers to NetBoot and pull down a new image at specified intervals. You can also create Windows and Linux images for quick dual-boot deployments, and set up the DeployStudio PC service to enable networked booting for your PCs.

If you manage a lot of Macs, especially public-use or lab computers that need to be reimaged regularly, making the imaging process more efficient can save a lot of time. DeployStudio takes functions of commonly used Windows deployment tools like a Windows Deployment Services (WDS) server or the System Center Configuration Manager (SCCM) and provides similar capabilities for Mac administrators, while being easier to set up and to use. Lion Server’s low price makes it relatively trivial to set up a basic NetBoot server—if you do, DeployStudio is an excellent and powerful tool to add to your arsenal.

Photo of Andrew Cunningham
Andrew Cunningham Senior Technology Reporter
Andrew is a Senior Technology Reporter at Ars Technica, with a focus on consumer tech including computer hardware and in-depth reviews of operating systems like Windows and macOS. Andrew lives in Philadelphia and co-hosts a weekly book podcast called Overdue.
59 Comments